The Power of Minimalism: Chic Fashion Clothes for a Timeless Look
In the fast-paced world of fashion, trends come and go in the blink of an eye. But one enduring style philosophy has stood the test of time—minimalism. Minimalism isn’t just a design trend; it’s a lifestyle and an approach to fashion that has captivated the hearts of those seeking a timeless, elegant, and effortlessly chic look. It’s about simplicity, refinement, and the belief that less is truly more.
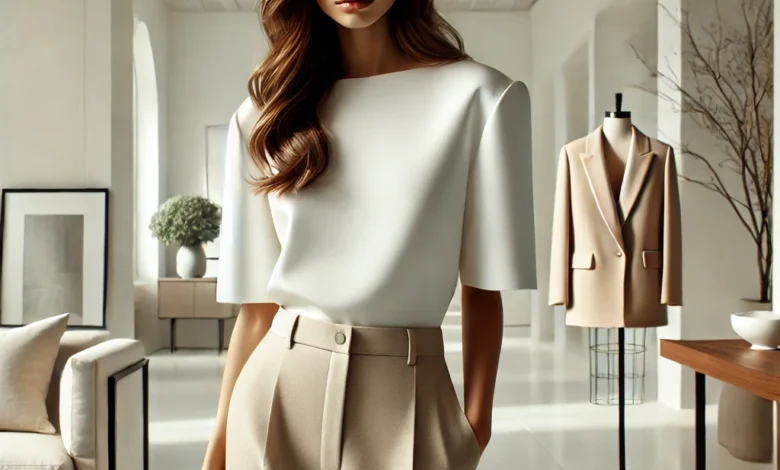
At the heart of minimalism is the concept of chic fashion clothes. These are pieces that prioritize quality over quantity, focusing on clean lines, neutral tones, and impeccable craftsmanship. The beauty of minimalist fashion is that it never feels dated. Whether it’s a tailored blazer, a little black dress, or a crisp white shirt, these are items that form the foundation of a versatile, long-lasting wardrobe. In this article, we’ll explore how minimalism shapes fashion, why it’s a perfect choice for women’s clothing, and how you can build a chic, timeless wardrobe that stands the test of time.
What is Minimalist Fashion?
Minimalist fashion is centered around simplicity and functionality. It embraces the “less is more” mindset, avoiding loud patterns, excessive embellishments, and fast-changing trends. Instead, it focuses on creating outfits that are understated but impactful, using high-quality fabrics and timeless silhouettes. Minimalist fashion often revolves around a neutral color palette—think blacks, whites, grays, beiges, and earth tones—though that doesn’t mean it can’t be bold. The right combination of minimalist pieces can still make a striking statement.
Why Minimalism in Fashion?
Why is minimalist fashion so appealing, especially to women? For many, it’s because minimalism represents more than just an aesthetic choice—it’s a lifestyle. In a world full of noise and clutter, adopting a minimalist wardrobe can feel like a breath of fresh air. It allows you to focus on what truly matters, creating a sense of order and clarity. Minimalism encourages the idea of investing in fewer but better-quality pieces, which can be more cost-effective in the long run. By focusing on versatility, chic fashion clothes in the minimalist style can transition effortlessly from day to night, from casual outings to formal events, without missing a beat.
Chic Fashion Clothes for Everyday Minimalism
Minimalist fashion doesn’t have to be boring or rigid. In fact, it can be incredibly chic when done right. Chic fashion clothes within the minimalist realm are all about refinement and sophistication. Here are a few key pieces every woman should consider adding to her minimalist wardrobe:
1. The Tailored Blazer
A well-tailored blazer is a cornerstone of minimalist fashion. It can instantly elevate any outfit, whether you’re pairing it with jeans for a casual look or wearing it over a dress for a more formal occasion. Stick to neutral colors like black, gray, or beige for maximum versatility.
2. The Little Black Dress (LBD)
No minimalist wardrobe is complete without the iconic little black dress. Its simplicity makes it the perfect canvas for accessorizing, but it’s chic enough to stand on its own. You can wear it to a dinner date, a cocktail party, or even a business meeting—it’s the epitome of versatile, timeless fashion.
3. Crisp White Shirt
A crisp white shirt is another minimalist must-have. It’s clean, sophisticated, and works with virtually anything. Whether tucked into a pair of high-waisted trousers or layered under a knit sweater, the white shirt adds a touch of class to any outfit.
4. Classic Denim
Minimalism isn’t just for formal wear; it applies to casual clothes as well. A pair of classic, well-fitted denim jeans can be worn year-round. Dark washes tend to be more versatile, while lighter shades work beautifully in the spring and summer months. The key is to choose a pair that flatters your body shape and avoid trendy cuts that might go out of style quickly.
5. Structured Handbags
Accessories play a critical role in minimalist fashion, and a structured handbag is an essential piece. Opt for a timeless design with clean lines and minimal hardware. It should be practical, with enough space for your daily essentials, but it should also complement your outfit without stealing the show.
6. Neutral Tones and Layers
Neutral tones are the backbone of minimalist chic fashion clothes. Think beige, camel, black, white, and navy. These colors are timeless, versatile, and easy to mix and match. By sticking to a neutral palette, you can create countless outfits with just a few key pieces.
To buy Chic Fashion Clothes, visit https://chichotclub.com/
Building a Capsule Wardrobe
A capsule wardrobe is a hallmark of minimalist fashion. It’s a carefully curated collection of essential, timeless pieces that you can mix and match to create a variety of looks. The idea is to simplify your wardrobe by focusing on quality over quantity and ensuring that every piece has a purpose.
How to Build a Minimalist Capsule Wardrobe:
- Start with the basics – Begin by investing in classic, versatile pieces like a black blazer, white T-shirt, high-quality denim, and a neutral trench coat.
- Stick to a cohesive color palette – Keep things simple by choosing a color palette that works well together. Neutrals are a great place to start, but you can also include soft pastels or muted tones if they align with your style.
- Choose timeless over trendy – Focus on timeless pieces that will still look great in five or ten years. Trends come and go, but classic pieces like a cashmere sweater or a wool coat never go out of style.
- Quality matters – Invest in high-quality fabrics like wool, cashmere, silk, and cotton. These materials not only look and feel luxurious but also last longer than cheaper, synthetic alternatives.
Why Minimalism Works for Women’s Fashion
Minimalism in women’s fashion is about more than just looking good—it’s about feeling confident, empowered, and comfortable in your own skin. The clean lines and classic silhouettes of minimalist clothes are flattering on all body types, making it an inclusive approach to fashion. Moreover, minimalist clothing tends to be incredibly versatile, allowing you to create a variety of outfits with just a few pieces.
Minimalist fashion also promotes sustainability. By purchasing fewer but higher-quality items, you’re making a conscious decision to reduce waste and focus on longevity. This is an empowering choice for women who are mindful of their impact on the environment.
The Power of Accessories in Minimalist Fashion
Although minimalist fashion is about simplicity, that doesn’t mean accessories are off-limits. The key is to choose accessories that complement your outfit without overwhelming it.
1. Statement Jewelry
Minimalist outfits often benefit from a single piece of statement jewelry. Whether it’s a pair of gold hoops, a delicate necklace, or a simple watch, these pieces can add just the right amount of flair to an otherwise understated outfit.
2. Classic Scarves
A scarf is a versatile accessory in a minimalist wardrobe. Whether it’s a lightweight silk scarf for summer or a chunky wool scarf for winter, this accessory can add warmth, texture, and color to your outfit without feeling overdone.
3. Elegant Footwear
In minimalist fashion, shoes are essential, but they should be chosen carefully. Look for elegant, understated designs like classic leather loafers, ankle boots, or simple heels. Stick to neutral tones for versatility, and avoid overly flashy designs that might detract from the minimalist aesthetic.
Seasonal Minimalism: Adapting Your Wardrobe
Minimalist fashion is not restricted by seasons. With the right approach, you can seamlessly adapt your minimalist wardrobe to fit the changing weather.
Spring/Summer Minimalism
For warmer months, opt for lightweight fabrics like linen and cotton. Flowing dresses, tailored shorts, and simple sandals can form the foundation of your minimalist summer wardrobe. Stick to a light, neutral color palette to keep things fresh and airy.
Fall/Winter Minimalism
When the temperature drops, layering becomes key. A wool coat, cozy cashmere sweaters, and structured boots can help you stay warm while maintaining a minimalist aesthetic. Stick to neutral or earthy tones, and don’t be afraid to add texture with knitted scarves or sleek leather gloves.
Minimalist Fashion for Special Occasions
Minimalism doesn’t just apply to your day-to-day wardrobe—it can also shine during special occasions. For events like weddings, galas, or dinners, minimalist fashion offers an understated elegance that stands out in a sea of over-the-top outfits.
1. The Simple Evening Gown
A sleek, floor-length gown in a neutral color like black or navy is the perfect minimalist choice for formal occasions. Look for gowns with clean lines and minimal embellishments, allowing the quality of the fabric and the cut to take center stage.
2. The Chic Cocktail Dress
For less formal events, a chic cocktail dress in a solid color can be both eye-catching and sophisticated. Paired with simple jewelry and elegant heels, a minimalist cocktail dress can make a powerful style statement without any need for flashy details.
Maintaining Your Minimalist Wardrobe
Once you’ve built your minimalist wardrobe, maintaining it is key to ensuring its longevity. Minimalist fashion emphasizes quality, so taking care of your clothes will help them last longer and stay in great condition.
1. Regularly Declutter
One of the core principles of minimalism is decluttering. Regularly go through your wardrobe and assess each piece. If it no longer fits your style or has worn out, it’s time to let it go.
2. Proper Care
Investing in high-quality clothes means taking proper care of them. Follow the care instructions on each garment, use gentle detergents, and avoid over-washing to maintain the quality of the fabric.
3. Quality over Quantity
Resist the urge to fill your closet with unnecessary items. Stick to the “less is more” philosophy, and only buy new pieces that will add value to your existing wardrobe.
Conclusion
Minimalism in fashion is about more than just wearing fewer clothes—it’s about embracing simplicity, elegance, and timelessness. By focusing on chic fashion clothes that are well-made, versatile, and classic, you can build a wardrobe that transcends trends and offers endless styling possibilities. Whether you’re drawn to the ease of a neutral palette, the versatility of a capsule wardrobe, or the empowerment that comes from making thoughtful fashion choices, minimalist fashion is a powerful tool for creating a timeless look.